Pendle W1 Bike Rack Review
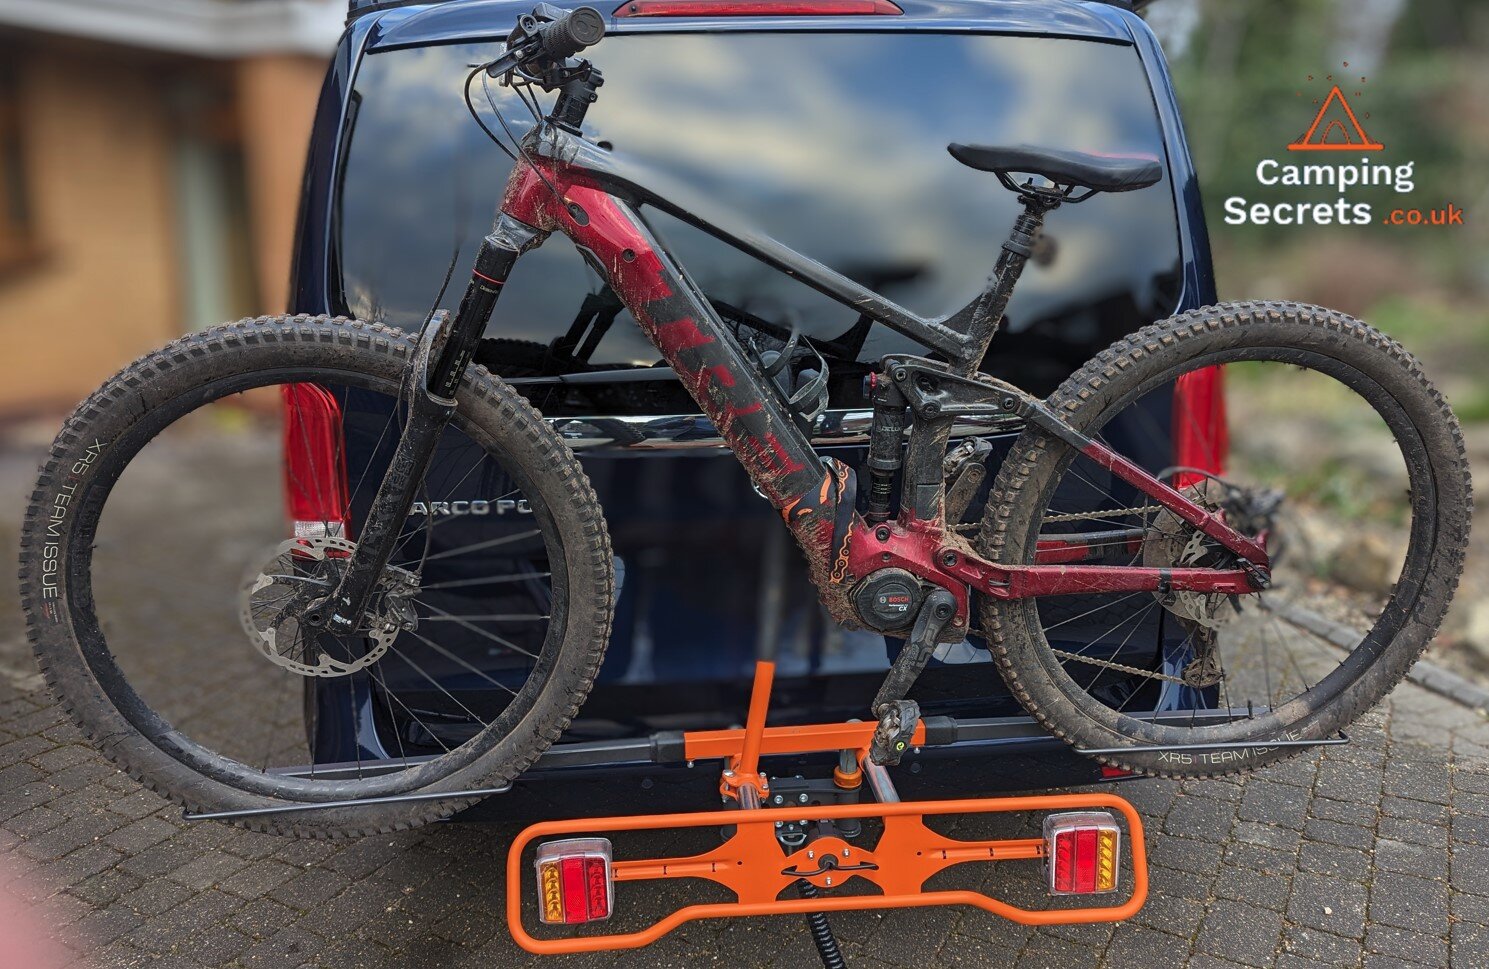
 The Pendle W1 bike rack has an exceedingly strong structure fabricated from high tensile steel. It’s capable of carrying any bike up to 40kg, and is perfect for my Trek Rail 7 ebike in XL sizing.
The W1 bike rack weighs 10 kg on its own without a bike attached which is perfectly manageable for a single person to lift and then attach to the tow bar of their car or campervan.
Pendle state that their bike racks “fit almost any vehicle with a tow bar and carry almost any type of bike”. We thought that we’d better check out these claims!
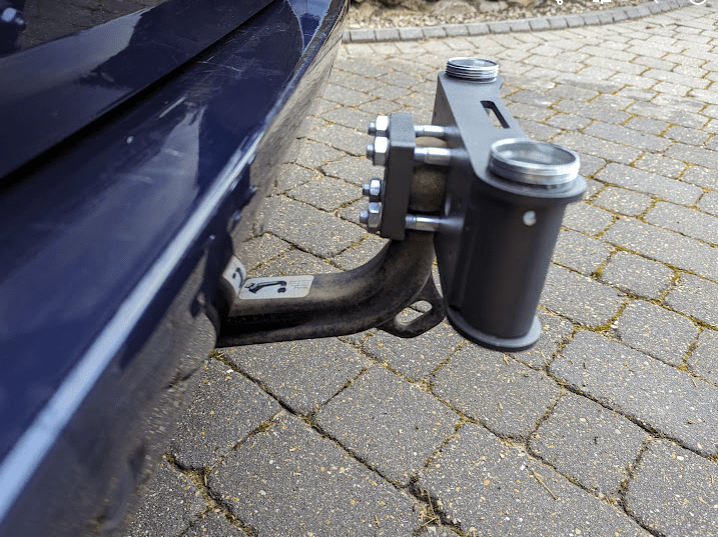 Universal Mounting Block
The bike rack comes with a super strong universal mounting block that must be bolted to the vehicle’s tow ball or alternatively behind the tow ball. This block can be left in place even when the bike rack is not fitted to the vehicle.
You can use the same universal mounting block for any of the towbar bike racks in Pendle’s range – from the W1 that we’re testing up to the W4 rack which can carry (you’ve guessed it), four bikes.
Leaving the mounting block on the vehicle enables faster fitting of the bike rack for trips out and about. The block has two hollow cylindrical cavities which accept two bars from the bike rack itself. Once the bike rack is slipped into the block, the whole system is secured in place using a steel plate.
Mounting Block Options – Behind or on the Ball?
The mounting block comes with different mounting options depending on whether you want to fit the main mounting block on the tow ball or behind the tow ball.
The benefit to fitting the mounting block behind the tow ball means that the tow ball is still accessible when the bike rack is not fitted so that a trailer, other bike rack or caravan can be fitted instead. Fitting behind the ball is only possible on standard 2 bolt flange tow bars – unfortunately, our campervan does not have one of these, and so for the review, the mounting block was mounted on the tow ball. Mounting on the tow bar is supported for swan neck, detachable and standard 2 bolt flange tow bars.
Bike Rack Section
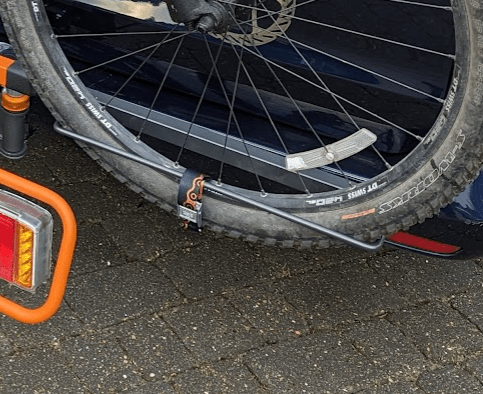 The Pendle W1 single bike rack carries the bike using what Pendle call “D-loops”. These are heavy-duty metal bars with wheel-sized holes to hold the bike tyres snuggly in position during transportation. There is a strap for each wheel that secures it to the D loop. In addition, there is a vertical pole on the bike rack that allows the bike frame to be secured with a strap that Pendle say will maximise protection for the bike paintwork.
The W1 bike rack comes with the standard D loop (the bit that holds the wheels steady and secure) but for some bikes, a smaller or wider D loop version may be required. These can be purchased for under £25.
It is recommended to get the correct D-loop for your bike type to make sure the bike is sitting safely on the rack.
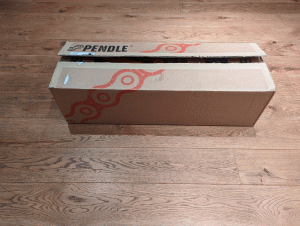 The rack was ordered directly through Pendle and I was pleased when the W1 bike rack arrived promptly and was very professional looking in a nicely sized, weighty box with the Pendle logo on it.
Upon opening the box it was clear that a lot of thought had gone into the packaging design as each main component had its unique place in the box and was nicely secured in position.
The instruction book was nestled at the top, so very easy to find and it listed all the items that would be required to build the bike rack. Yes, BUILD the bike rack. This is not at all what I was expecting. All the bike racks we have had up until now have had fitting instructions on how best to fit the bike rack for the vehicle but the bike racks themselves had been pre-built so this was a first. So how did I get on?
Putting the rack together
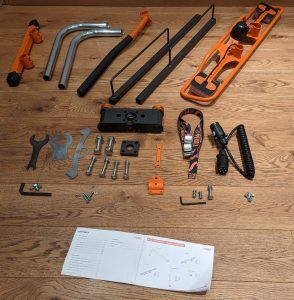 Each component part of the bike rack felt excellent quality and sturdy. There was nothing that felt flimsy or cheap. Better still there was no plastic apart from the little bags to store the nuts and bolts. A massive thumbs up from a recycling perspective.
It took about 30 minutes to assemble the rack. I was taking pictures at the same time and laying the items out relatively neatly compared to when I am not reviewing an item so I would say under 30 minutes.
The assembly guide was very good, all the tools required were in the box and the rack soon took shape. This was a single bike rack, the smallest of the Pendle bike rack range. You could add around 10 minutes for each additional bike bracket. I would also recommend for larger racks assembling the rack directly on the tow bar as it gives easier access to the underside but it is not essential.
By assembling the rack yourself it is easy to see where adjustments can be made to fit specific bike sizes. The wheel D loop bars can be slid in and out of the main frame to make the width correct for bikes of different lengths. It’s just one bolt per D loop to allow for this adjustment. The bike could also be positioned nearer or further away from the car to allow for handlebar widths. We have had bike racks previously that hold the bikes too close to the car so that you have the handlebars knocking on the rear window every time you go over a bump. This all makes this rack very user-configurable.
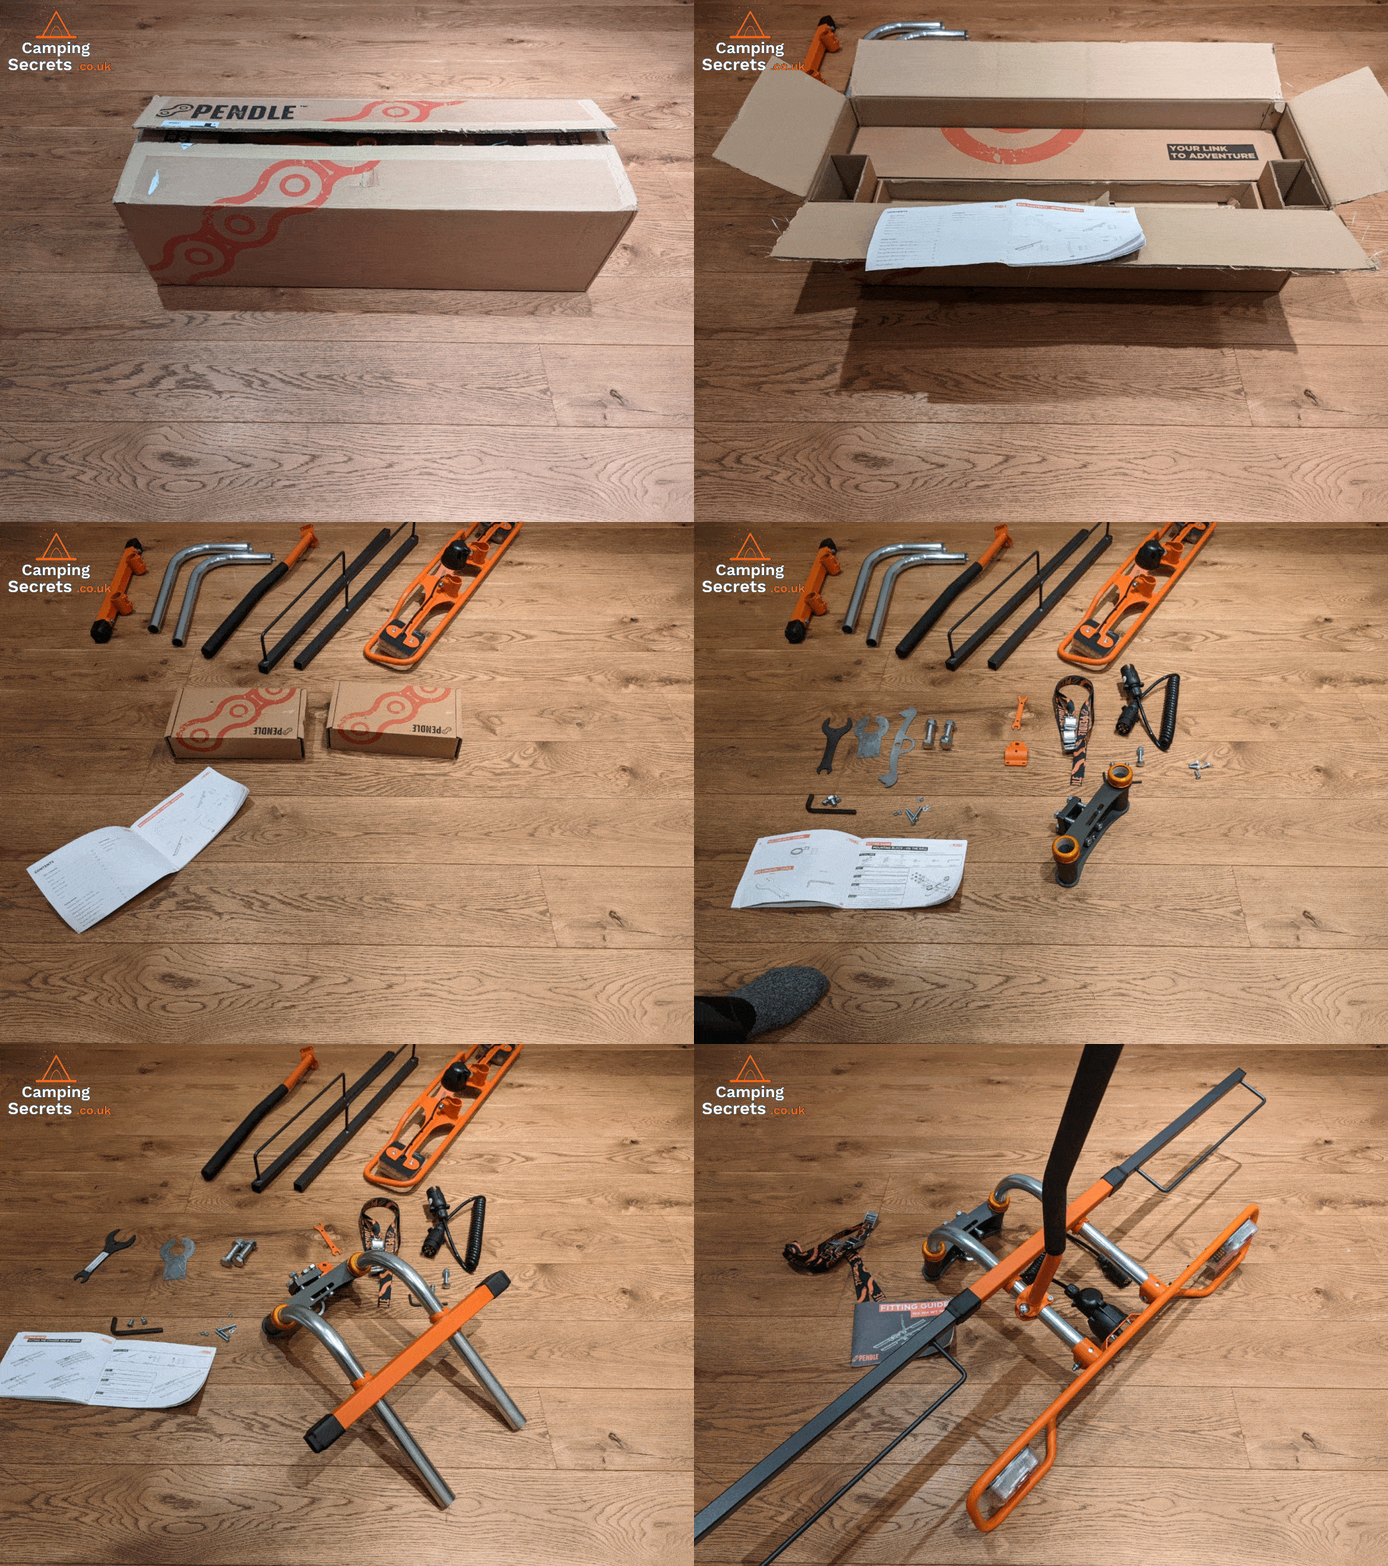
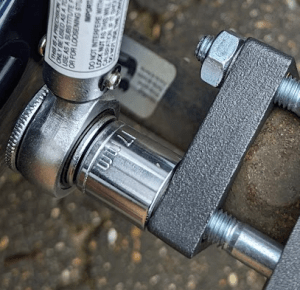 Fitting the block – The universal mounting block is used to fit the rack to a vehicle’s tow bar. We used the “on the ball” variant of the mounting block and it took less than 5 minutes to attach securely to the tow ball using the 4 bolts provided.
Pendle supplied the correct spanner and Allen key but you could use a socket wrench instead of the spanner. I ended up using a 17mm socket which did the job nicely. Once fitted correctly with all the nuts tightened, the mounting block felt very securely attached to the tow bar.
Fitting the rack – The next step was to place the bike rack tubes into the two holes in the mounting block. The bars need to go all the way in so that the tubes poke out the bottom of the block. There are two slots in the base of the tubes where the security plate slots into when fitted correctly. Once the security plate has slid into place it is secured with a single bolt using the spanner provided. This was fairly straightforward on the single version of the rack. It may get trickier for the larger bike racks due to accessibility. Having said that once the tubes are in the mounting block the weight of the bike rack is taken up by the block so you are free to move around and have both hands free to make the adjustments. The two orange socket caps were then tightened using the other end of the same spanner.
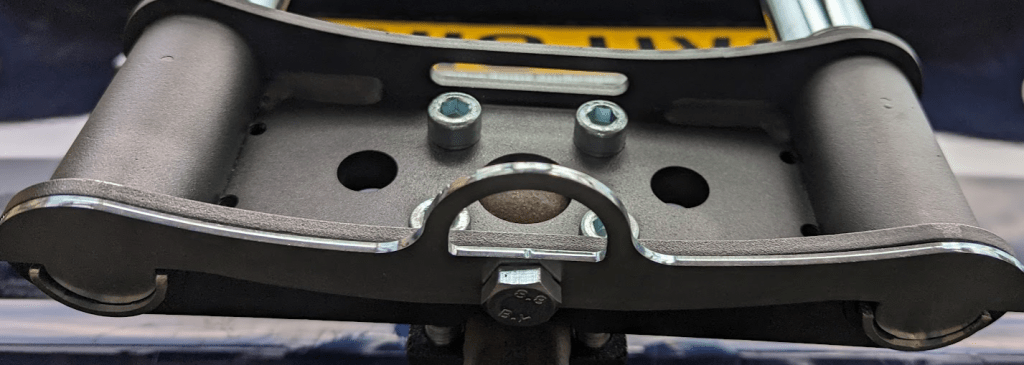
The mounting block can be left attached to the vehicle between trips so that just the rack needs to be fitted each time. Every time the bike rack requires fitting to the mounting block this process will need to be carried out (or in reverse when removing the rack).
In Use
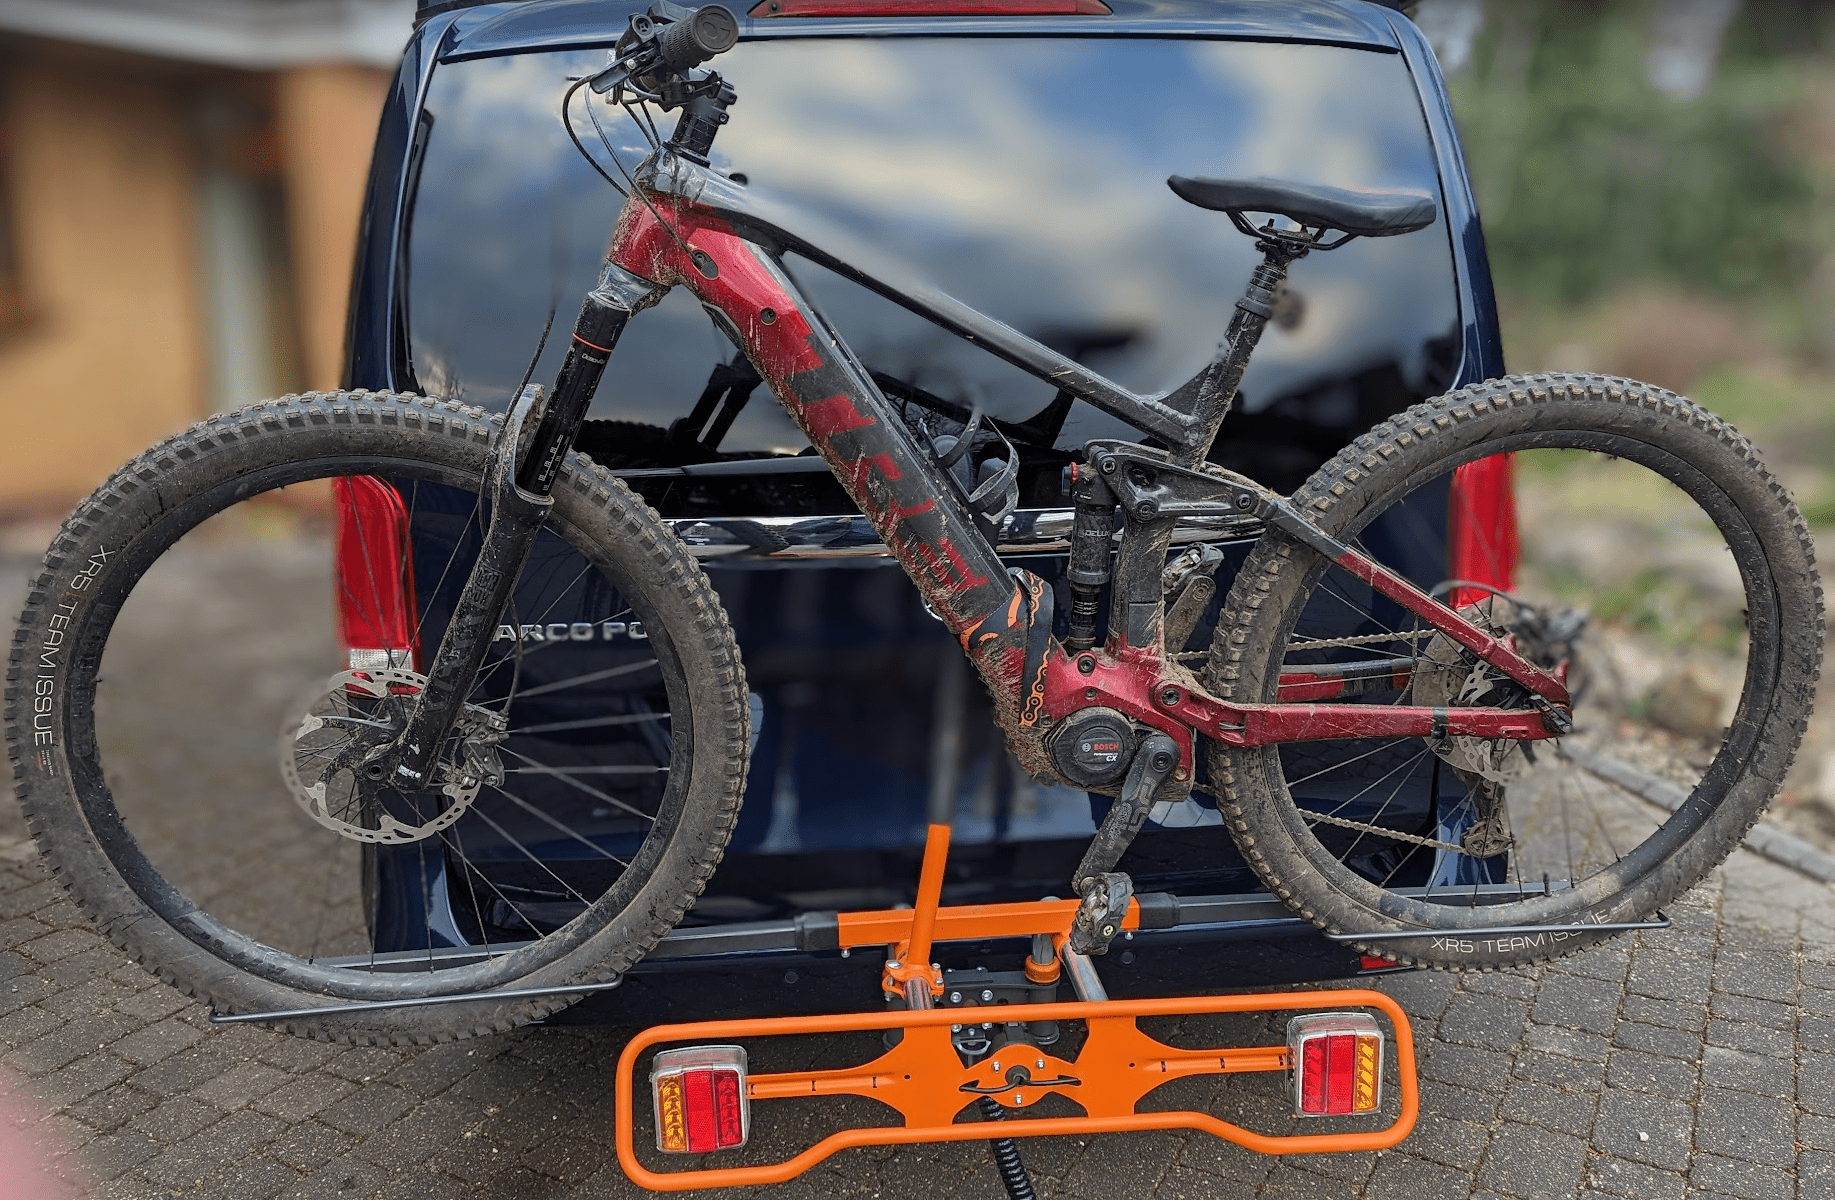
I must say that once the rack was fitted to the mounting block it felt very securely attached to the car and there was no doubt that the rack would bear the weight of an extra large mountain E-bike weighing in at around 25 Kg with no problem at all. As you can see, the Trek Rail 7 with a 128cm wheelbase fitted perfectly and felt very secure. This was with the standard D-loops.
In total I tried three different bikes with different widths to see how easy the D Loop bars were to adjust when a bike was placed on the rack. It was fairly easy to move the bars in or out for the correct adjustment. One bolt will secure the D loop bar in position.
Something to note is that when building the rack I placed the vertical support bar in an upright position i.e. 90 degrees angle to the wheel supports. It was tricky to make the extra large electric mountain bike secure at this angle but this may have been down to the circumference of the bike down tube which was larger than your average bike to hold the battery and the fact that it had rear suspension where the seat tube is on a bike without rear suspension. I ended up loosening the bar so that I could angle it to match the angle of the bike frame. This meant it was easier to tie the securing straps around the bike and bar with a tighter grip which felt more secure. Not forgetting to tighten up the vertical bar again of course.
Bike Security
The bike rack itself is essentially bolted to the tow bar, and so any would-be thief would need a set of tools to remove it. The bikes are simply strapped to the rack and could easily be stolen unless other precautions are taken.
We would recommend that you use your standard bike lock (e.g. a D-lock) to secure your bikes to the rack. Of course, if you’re facing a determined thief then no lock or bike rack will protect you. However, it makes sense to cause as much difficulty for them as you can.